
(This article was co-written with Keith Keough)
Slack is our communication tool of choice at Code Hangar. On top of the obvious benefits of simple multi-team support, and excellent UI experiences across web and desktop / mobile native apps, it has an awesome library of integrations.
In this post we will explore Slack's Slash Commands and Incoming Webhooks. In one our upcoming projects, we were ready to invite a few initial users to help us test the platform, but wanted to restrict certain access to only those people we had directly invited. This was achieved by a simple activated: true|false flag for each user in the database.
Incoming Webhook
For New User Sign Up Notifications
At first, new invitees would sign up, and then had to contact us directly (via phone/text) to enabled their account before they could start using the platform. We decided we could improve this experience drastically by having our API send us a Slack notification upon new account signups (which would at least remove the need for users to contact us directly). This was done using a Slack Incoming Webhook.
- To create one, view the Integrations section for your Slack team, search for "incoming" in All Services, and click "View"
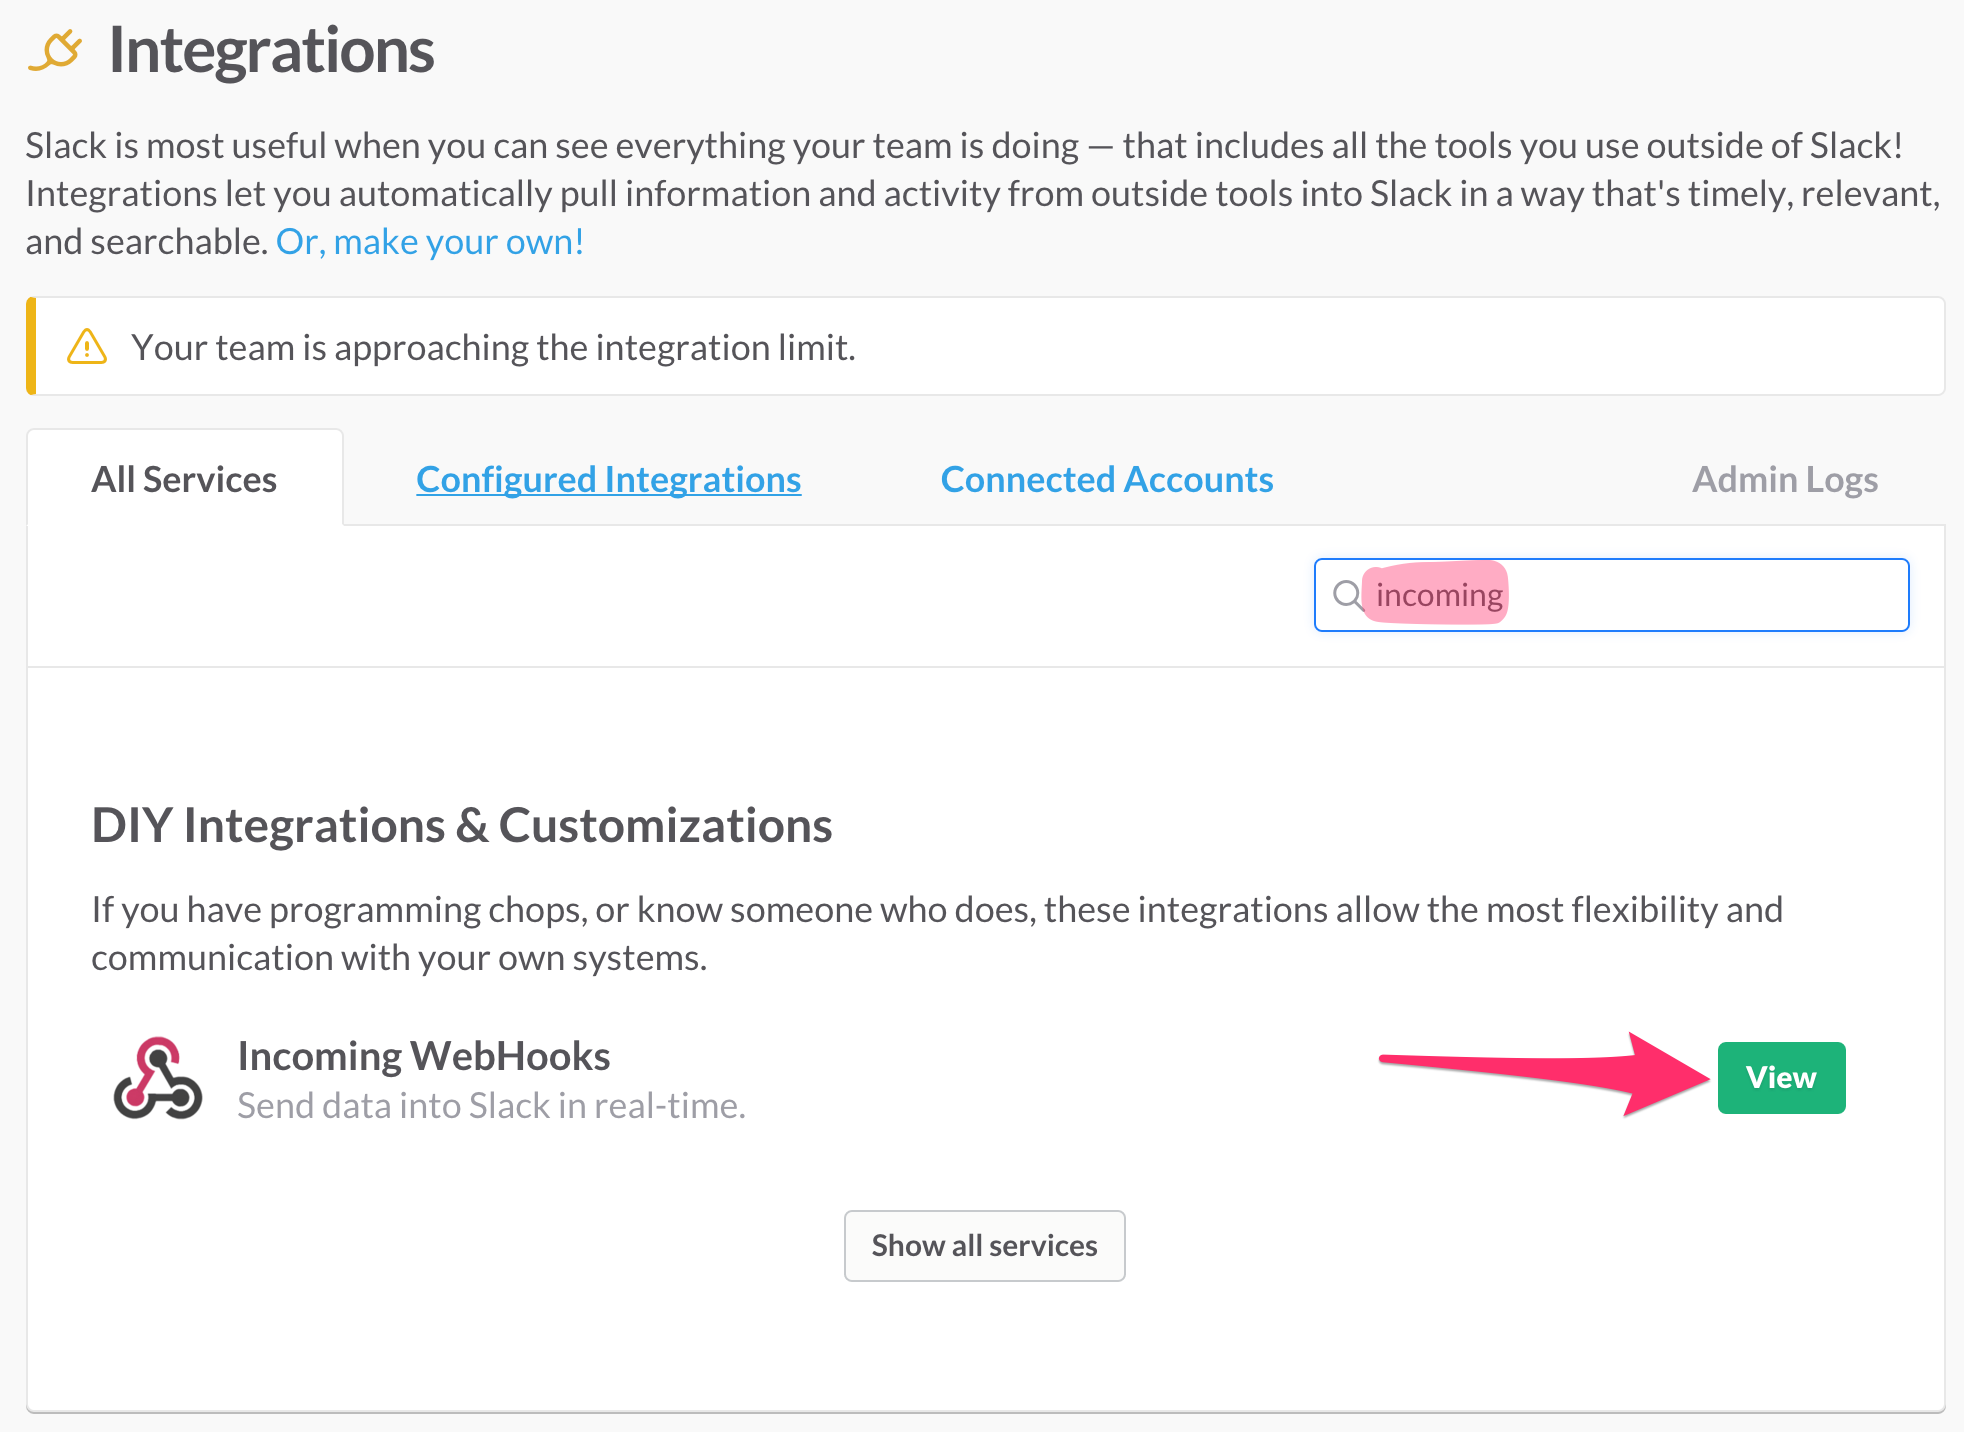
-
On the following screen, select the default channel your notifications will post in to (you can choose override this later when sending the message)
-
On the detail page for this integration you can choose default sender name and icon (these can also be changed when sending the message)
-
Use the setup instructions on found on that page for guidance. But the main thing to grab here is the Webhook URL. This is the address your application will send an HTTP
POSTto. -
Below is an example in Node.js, using Slack's
Attachmentmethod for richly-formatted messages. You can also see where the Sender's name (username), channel, and icon are being overriden:
/*
 * Called by user sign up controller
 * @param user - User object
 */
function sendNewUserSlackMessage(user) {

    // Slack Message Body
    var jsonBody = {
        "username": "Hipster Thesaurus",
        "channel": "#hipster-signups",
        "icon_emoji": ":eyeglasses:",
        "attachments": [{
            "fallback": "New User Signup on " + process.env.NODE_ENV.toUpperCase(),
            "pretext": "New User Signup :writing_hand: on " + process.env.NODE_ENV.toUpperCase(),
            "color": "#1CCDCD",
            "fields": [{
                "title": "_id",
                "value": user._id,
                "short": false
            }, {
                "title": "displayName",
                "value": user.displayName,
                "short": false
            }]
        }]
    };

    // HTTP Request options
    var options = {
        method: 'POST',
        url: YOUR_SLACK_WEBHOOK_URL,
        json: jsonBody
    };

    // Send HTTP Request
    request(options, function(error, response, body) {
        if (error) {
            console.error(error);
        }
    });
}
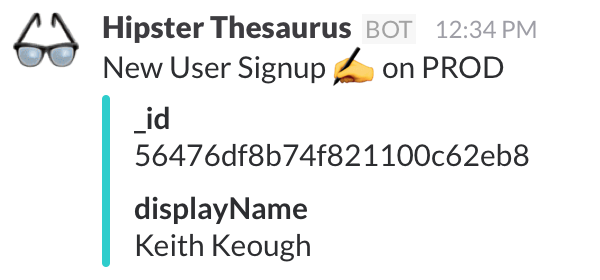
- Here is the result of the above message in Slack:
Slash Commands
For Activating New Users
At this point our entire team would be instantly notified via whenever a new user had signed up. This was an excellent first step, but one of us had to be physically present at a computer with a database connection open in order to manually set the user's activated flag. By including a new API route for user activation, and integrating a slack command to call that api, anyone one of us could activate users from anywhere (since we all have Slack on our phones).
-
To create add the
Slash Commandintegration as we did above -
Below is a screenshot of the key settings:
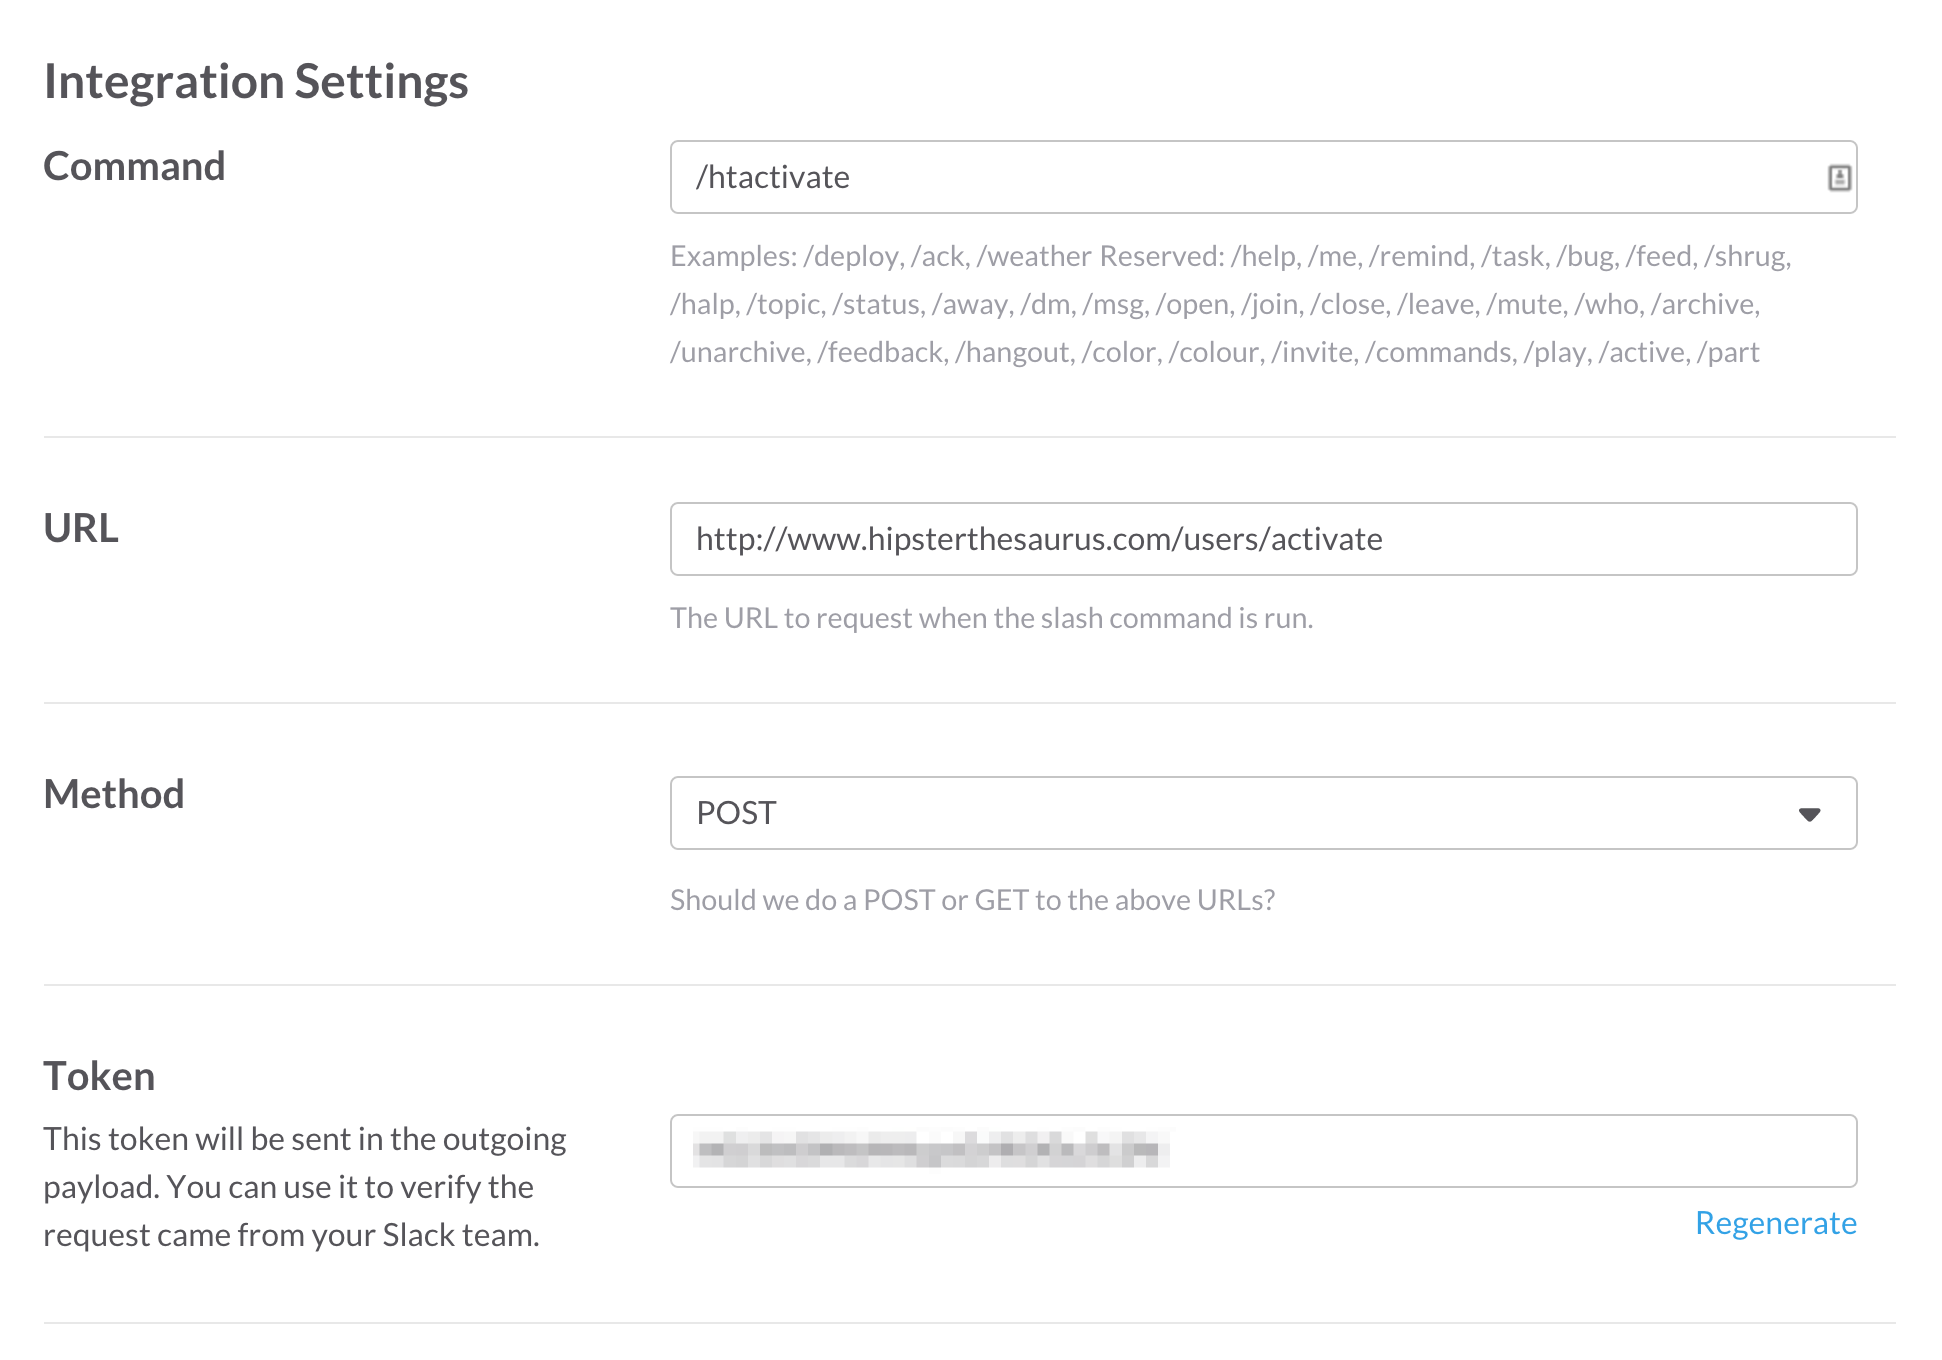
-
Commandis what you will type in Slack -
URLis the api endpoint you want to trigger in your web service. (You can use a service like http://requestb.in/ to inspect the payload being sent by Slack, as you are writing to receiving endpoint) -
Methodis the HTTP Verb/Method you want to use -
Tokenshould be used by your web service to verify the request -
Below is an example of our receiving endpoint in Node.js (express)
router.post('/activate', function (req, res) {
    // Verify Slack Token is correct
    if (req.body.token && req.body.token === $G('Config').slackToken) {
        // Find matching user by id, passed in as 'text' parameter from Slack
        User.findOne({
            '_id': req.body.text
        }, function (err, user) {
            if (err) {
                res.mFailure(err);
            } else if (user) {
                // Set user as activated and save
                user.activated = true;
                user.save(function (err, user) {
                    if (err) {
                        res.mFailure(err);
                    } else {
                        // Send reply back to Slack
                        res.send(user.displayName + ' has been activated!');
                        // Send special notification to Slack (to update entire team)
                        $G('Srv').Slack.activatedUser(user);
                    }
                });
            } else {
                res.failure('E005');
            }
        });
    } else {
        res.send("Invalid Token");
    }
});
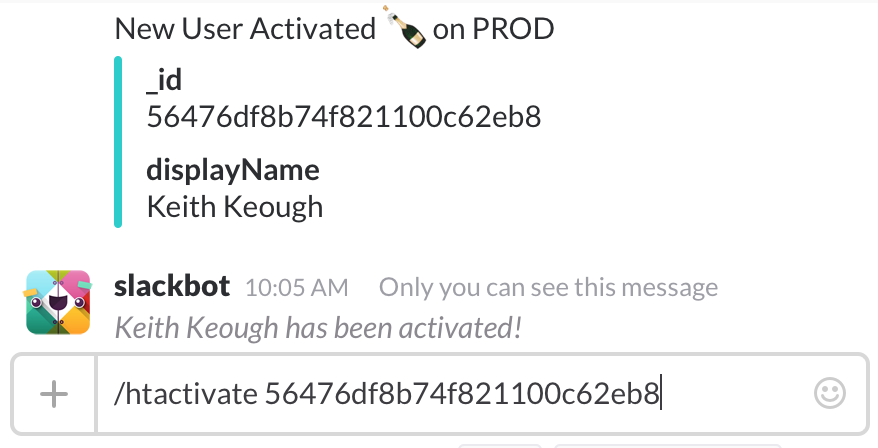
- And the result of sending the slash command:
And that's it! With a few simple Slack integrations we were able to transform our internal messaging tool into an administrative tool. Let us if you have any questions, or any cool Slack slash commands of your own in the comments below.
About Author: Ian Grail

Software Developer. Aspiring Pool Lounger.