A software prototype is a necessity for anyone who is in the early stages of an app development process. It will help you understand your own product better which will allow you to communicate your vision more effectively to software developers, future users, and even potential investors. In this blog, we’ll break down the five steps needed to take your idea for an app to a clickable digital prototype.
1. Define the App’s Users
The first step in early app development work is to define the core users of the app. While you might have a long term vision to help a large general audience, at first, you need to define who the early users are and why they need your app. It’s also important to think about how they’ll find out about your app and the steps they’ll take to use it.
Even large companies like Facebook and Amazon started with a small defined goal. Facebook wanted to create an online college database of student profiles while Amazon created a digital bookstore. They were only able to grow and expand to a larger audience because they first designed a product for a narrowly defined group. Only later did they expand their target users.
Just like those big companies solved a narrowly defined problem at first, you also need to define a specific problem your app will solve for the core users you want to serve.
There are two categories of users your app might support: either providers or consumers. A provider is someone who offers a product or service through your app. A consumer is someone who uses the tools or services or buys product from the app. Some apps will connect providers and consumers to each other. However, your app might only be a tool for one type or the other.
However, some apps might need to be a tool to both types of users, even from the beginning. If that’s the case, both types of users will have different goals and needs the app will need to address.
For example, Etsy has both providers and consumers. Consumers have certain screens they can search for and purchase products. Providers screens will include ways to post products and interact with customer questions.
2. Define the Goal for the App’s Users
Once you know who the users are, define the goal they want to achieve with your app. This will be the problem they want your app to solve for them.
If you have multiple users, each user type might have a different goal. In the Etsy example above, the consumer’s goal is to buy a one of a kind handmade piece. While the provider’s want to find an audience who will buy their artisan wares.
The app is the tool to help the users meet their goal. In the next step you will map out the steps to make that possible with your app.
3. Identify how the user flows through your app
Now that you have defined your users and their goals, you will need to map out how your app will achieve them. To do that, you will need to write out each step the user takes through your app until they reach their ultimate goal.
To think about each step more concretely, think about each screen a user will navigate through. Screens depict the actual visual front-end part of your app. However, each screen will have functional aspects, like buttons and menus, that help navigate each user to their goal.
The visual design of the screens is not important in this stage, instead it’s more important to design the process the user will take and what the function of each screen will serve. Typical screens will include login, profile, or checkout.
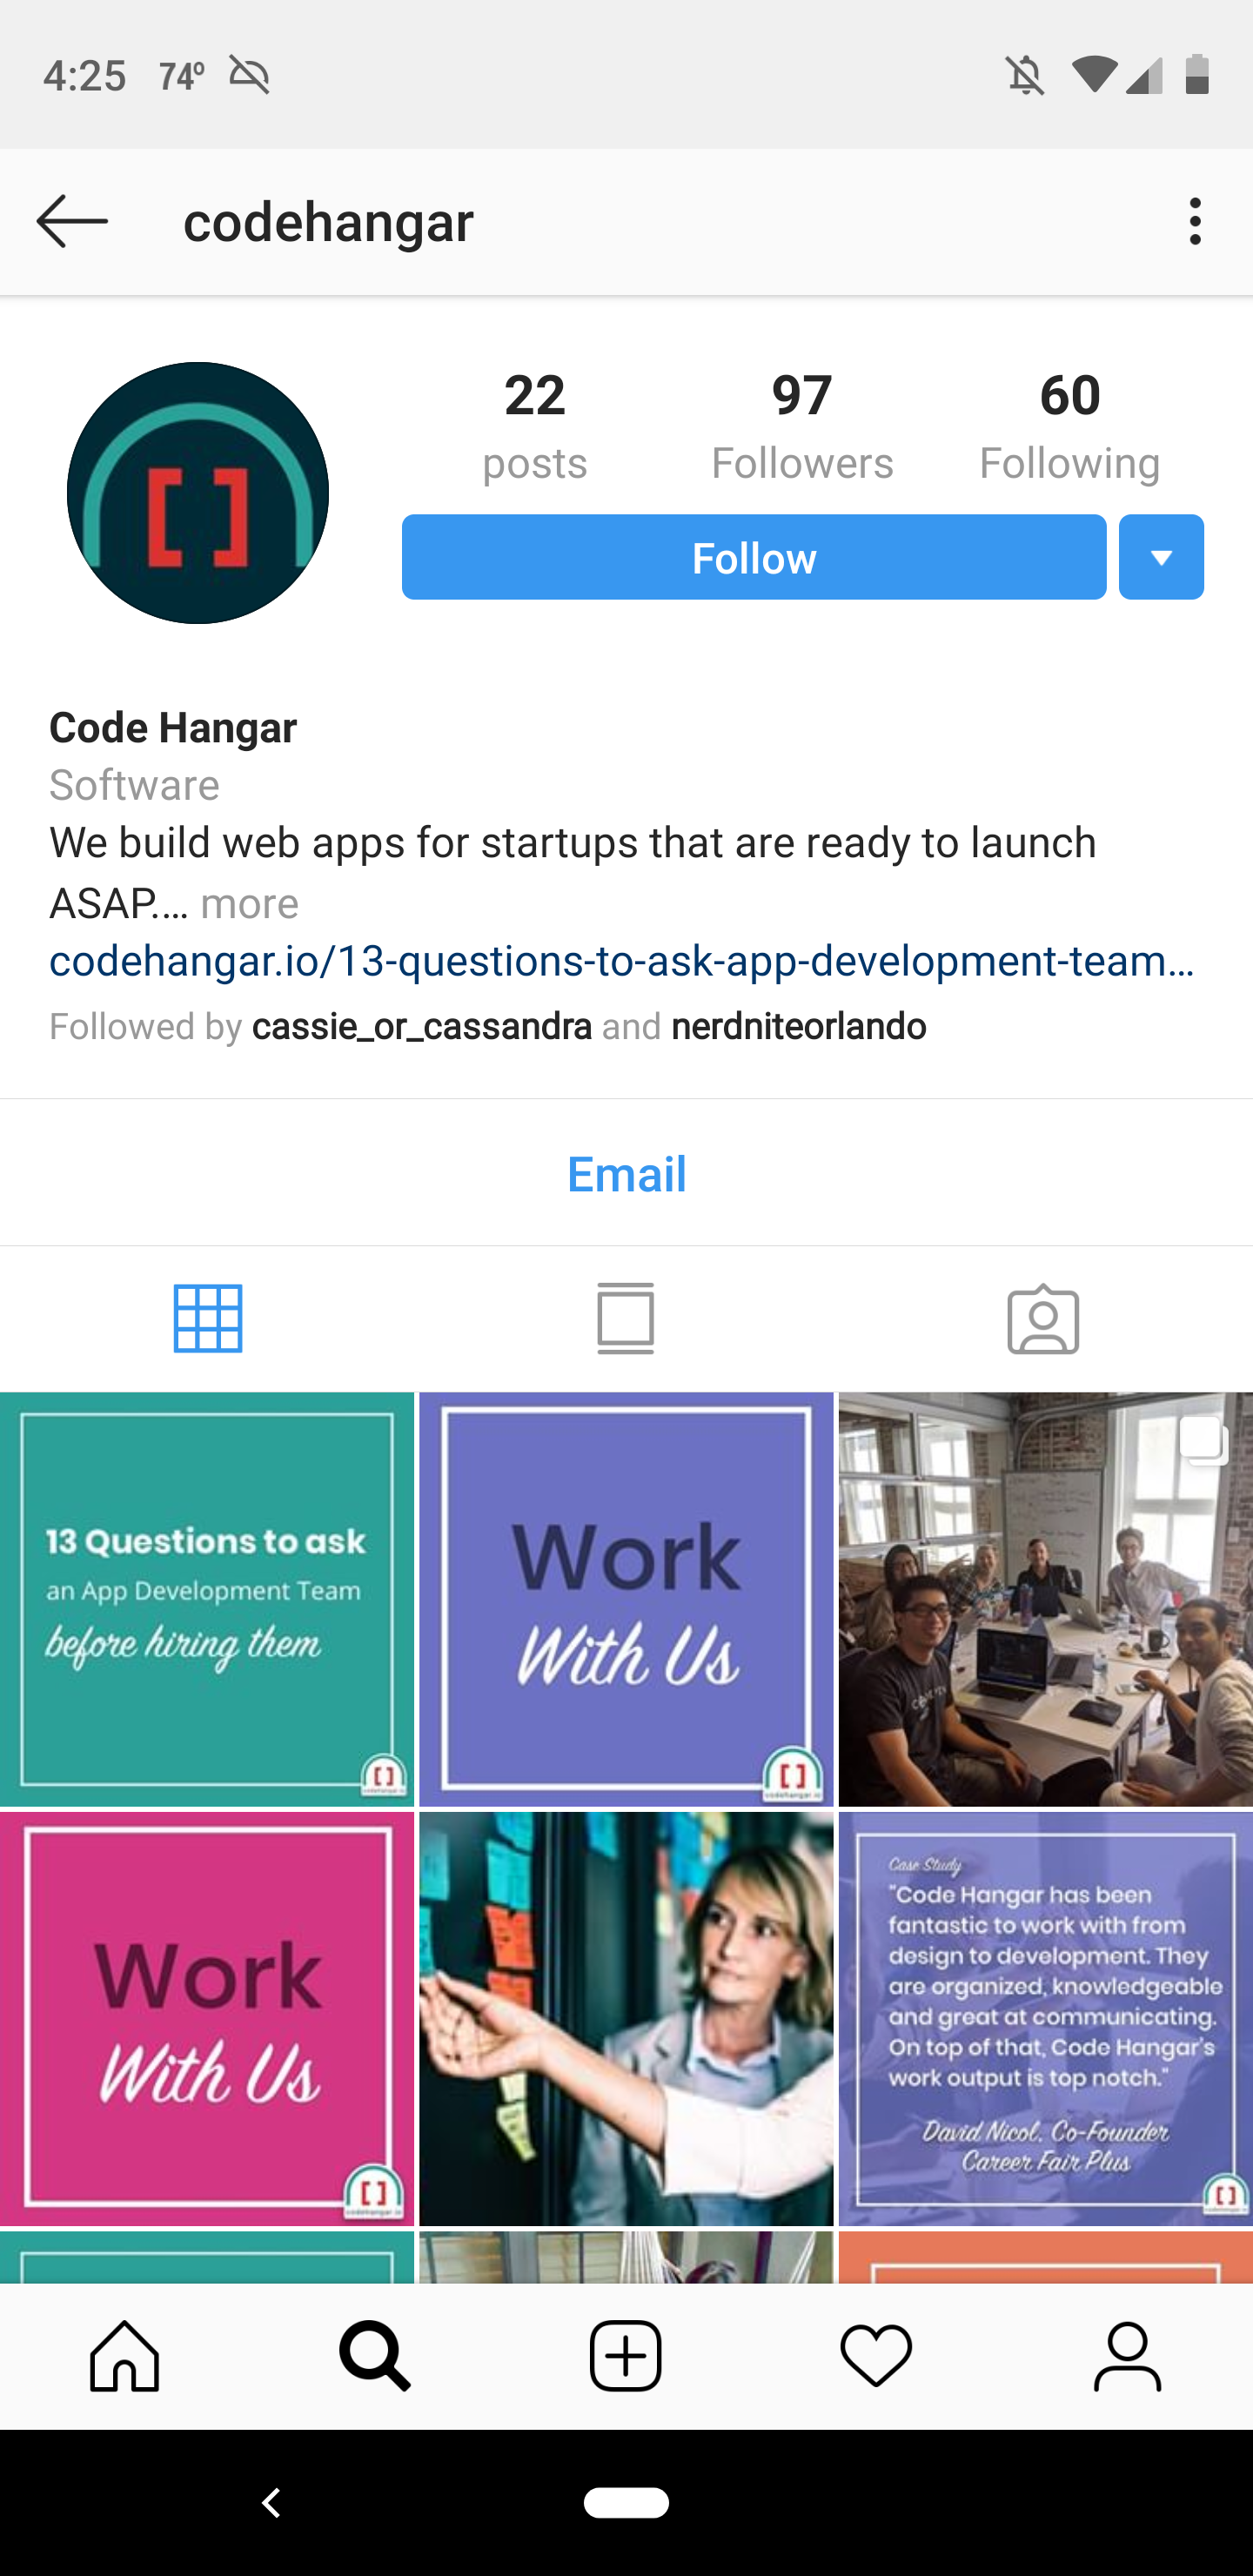
Here's an example of Code Hangar's profile screen on Instagram
The simplest way to write out this process is to create a bullet list of screens the app needs to achieve the user’s goal. If there are multiple users types, you will need to consider what screens each type of user will need and how they are connected to each other.
As an example, if you made a list of a popular app like Instagram, the home screen for your bulleted list might look like this.
- Home screen
- Direct messaging button
- Add to your story button
- Instagram stories from other users
- Feed of regular posts from other users
- Home button
- Search button
- Add new photo or video button
- Notifications button
- Profile Button
Each subcategory in the above list will lead to a new screen that will have its own elements to define also in it’s own bulleted list. The next step will help you define how each screen is connected to each other.
4. Create a product map with relevant screens you will need to make
After you create your bulleted lists, it’s time to create a product map or a wireflow. This is now the time to start connecting visual aspects with the functionality of each screen.
A wireflow connects the visual aspects of each screen with how they are all connected within the app. At the end of this process, the wireflow will be your visual blueprint that you will eventually hire a software developer to build.
Use your bulleted list from the previous step to help lay out the visuals of each screen. Remember elements that will be on every page such as menu bar and logo. Next, identify each functional aspect of the screen that will lead someone to another screen. Then draw out how you imagine that screen will look. Connect screens with arrows to show how a user will go from one screen to the next one.
Below is a drawing of a wire frame from a previous project we did for Florida's Pycon Conference. 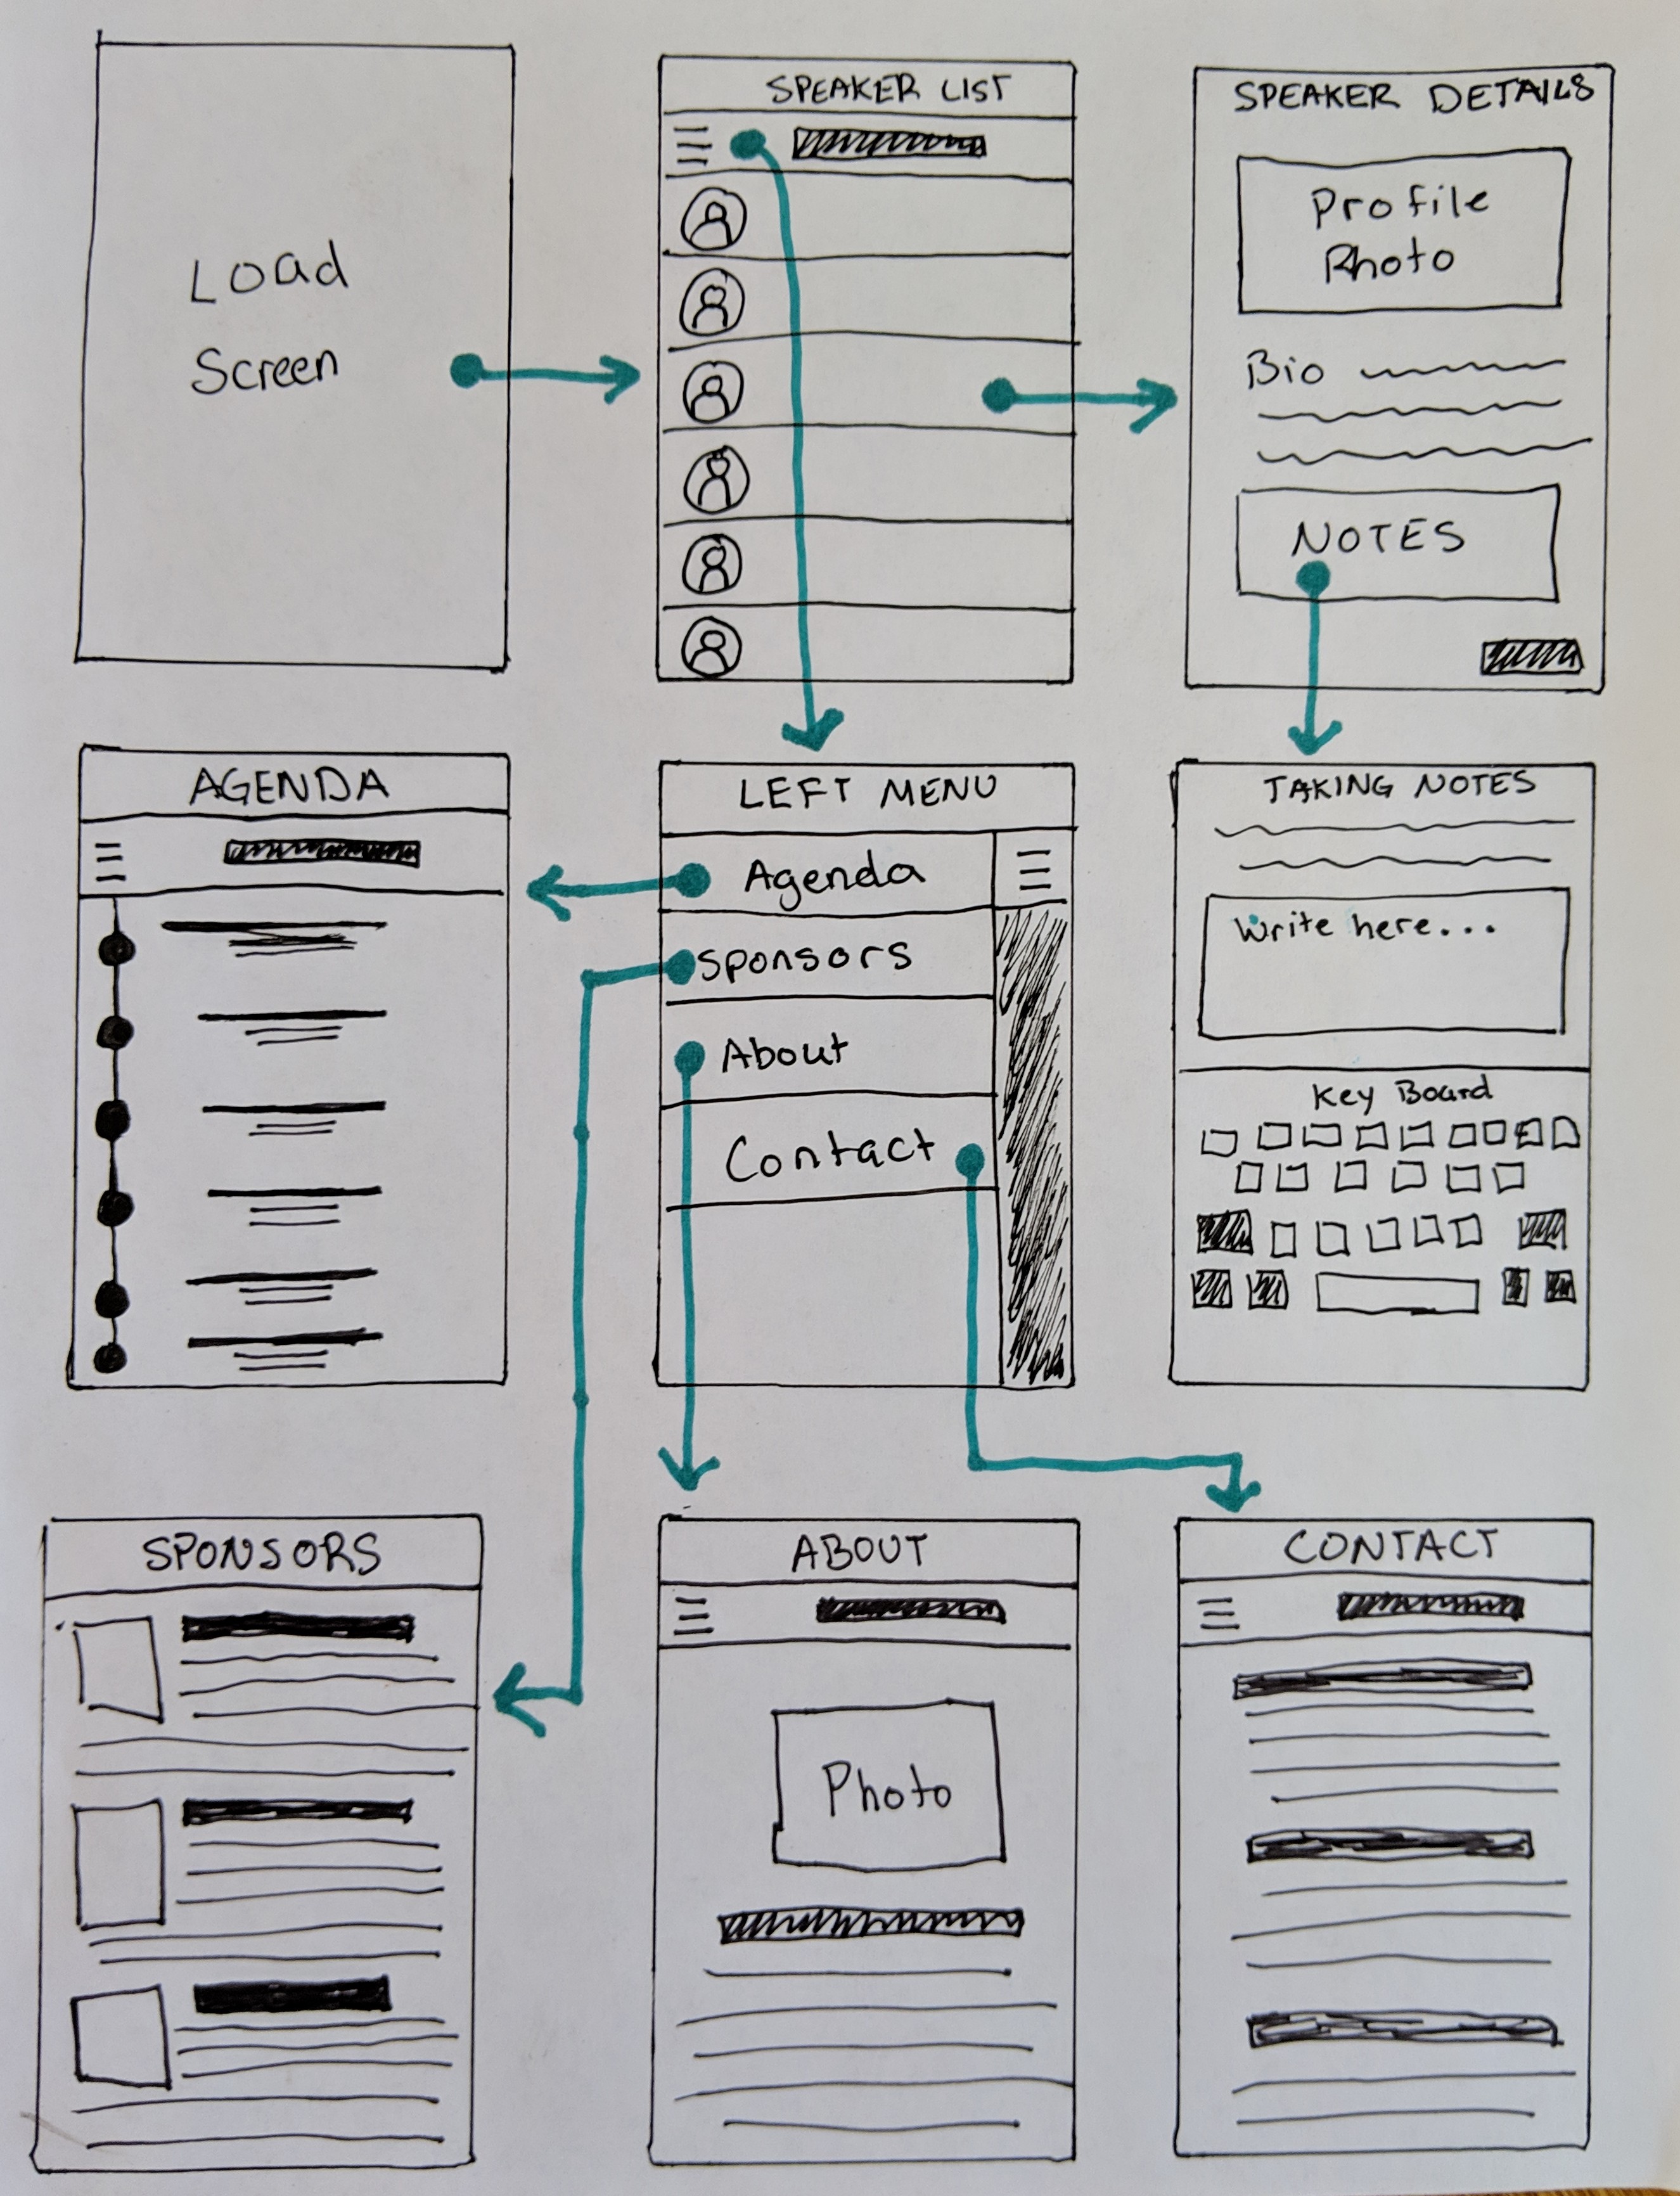
You can see how both the visual aspects of each screen is shown along with where each button will lead the user and what they can do. It can easily help you visualize what a finished paper prototype would look like. Of course, you could create this on a computer too if you would rather use design software.
Wireflows will most likely include some decision trees too that might give users multiple results depending on the user’s action. For example, on a login screen, if the user types in the wrong information, instead of taking the user to their home screen, it will take them to a forgotten password screen.
Remember, at this stage the paper prototype doesn’t need to be perfect. In fact, it doesn’t even have to look that pretty! With an ugly prototype, you can reach out to developers who can help you realize your vision in a working app. The next step in the process will allow you to add design elements to your wireflow in order to build a more visually appealing prototype.
5. Design a graphic representation of the app
The final step in your prototyping process is to create a clickable graphic representation of your app. This will allow others see what your finished product will eventually look like.
The simplest way to make a clickable prototype is to create a powerpoint slide for each screen from your paper prototype. Use internal links to connect slides to give the impression of what it will be like to use the eventual app.
A few other prototyping tools we recommend and require no coding are Sketchapp, Invisionapp, and Bubble. With each of these tools, you can build various slides that will have some design elements and clickable buttons to give the prototype some frontend functionality.
Going the extra step to create a clickable prototype will help you more easily convey your app’s vision to the eventual developers you work with. With it you can also start testing the market with your targeted users and pitch investors to raise capital to build the app.
We hope this helps you to better define your idea and create an app that has a strong foundation. Once you have your clickable prototype, we would love to know more about your project. We can help you build an app with our 8-weeks to MVP or a customize ongoing package. Contact us so we can learn more about the project you want to build.
About Author: Code Hangar

Code Hangar is a software development company that builds amazing web, iOS, and Android apps for startups that are ready to launch ASAP. Are you ready?